How to Film Running - Editing a Running Video
A repeatable workflow for commercials, shorts, YouTube, and documentaries (How to Film Running Masterclass)
Editing is the difference between a running video that looks nice and a running film that people actually remember.
Most running videos fail for one reason: they’re edited like recaps instead of stories. They become a highlight montage of “best shots” with a generic track doing all the emotional work. The athlete could be running anywhere. Nothing lands. Nothing changes. Nothing sticks.
This post lays out a clean, repeatable workflow you can use in Premiere (or any NLE) to turn raw running footage into an edit with momentum, emotion, and clarity. The process is nine steps and it works whether you’re cutting a social short, a commercial, or a documentary-style YouTube film.
Part 1 - Story Spine
Step 1: Choose the spine before you touch the timeline
Before you start dragging clips into a sequence, decide what kind of running video you’re making. This single decision makes every editing choice easier, because it tells you what to prioritize.
There are three common “spines” for running films:
Spine A: Social shorts
Shorts are built around one idea and one moment. Clarity wins. Speed wins. You’re editing for someone who is half-distracted. Your job is to land one point fast, then get out.
Spine B: Commercial
Commercials are emotion-first. It’s a vibe with a point. Music becomes the engine. Visuals become the proof. Structure is tight. Every shot needs to justify its place.
Spine C: Documentary / YouTube
Doc and YouTube edits are driven by story logic. It’s interviews, narration, and scenes that mean something. The run is often the thread, not the whole fabric. You guide the viewer through an arc.
Pick one spine. You can blend later, but you need a dominant format. If you don’t choose a spine, the edit will choose one for you, and it will usually become a montage.
Step 2: Prep + Selects (10–20 minutes)
Professionals don’t start by editing. They start by creating clarity.
Set up your project so you’re not hunting for clips and losing momentum. A basic organization system saves hours later and keeps you in a creative headspace instead of a logistical one.
A simple folder/bin structure that works:
A Cam
B Cam (if any)
Drone
Audio
Music
SFX
Exports
If you recorded external audio, sync it now. If not, still identify which clips have usable natural sound. Running films live and die by breath, footsteps, and ambient texture.
Then create a single sequence called SELECTS.
This timeline is not your edit. It’s you understanding the footage. Drop in the clips that have potential and cut out the dead space. Don’t overthink pacing yet. You’re just building a deck of cards you can play with.
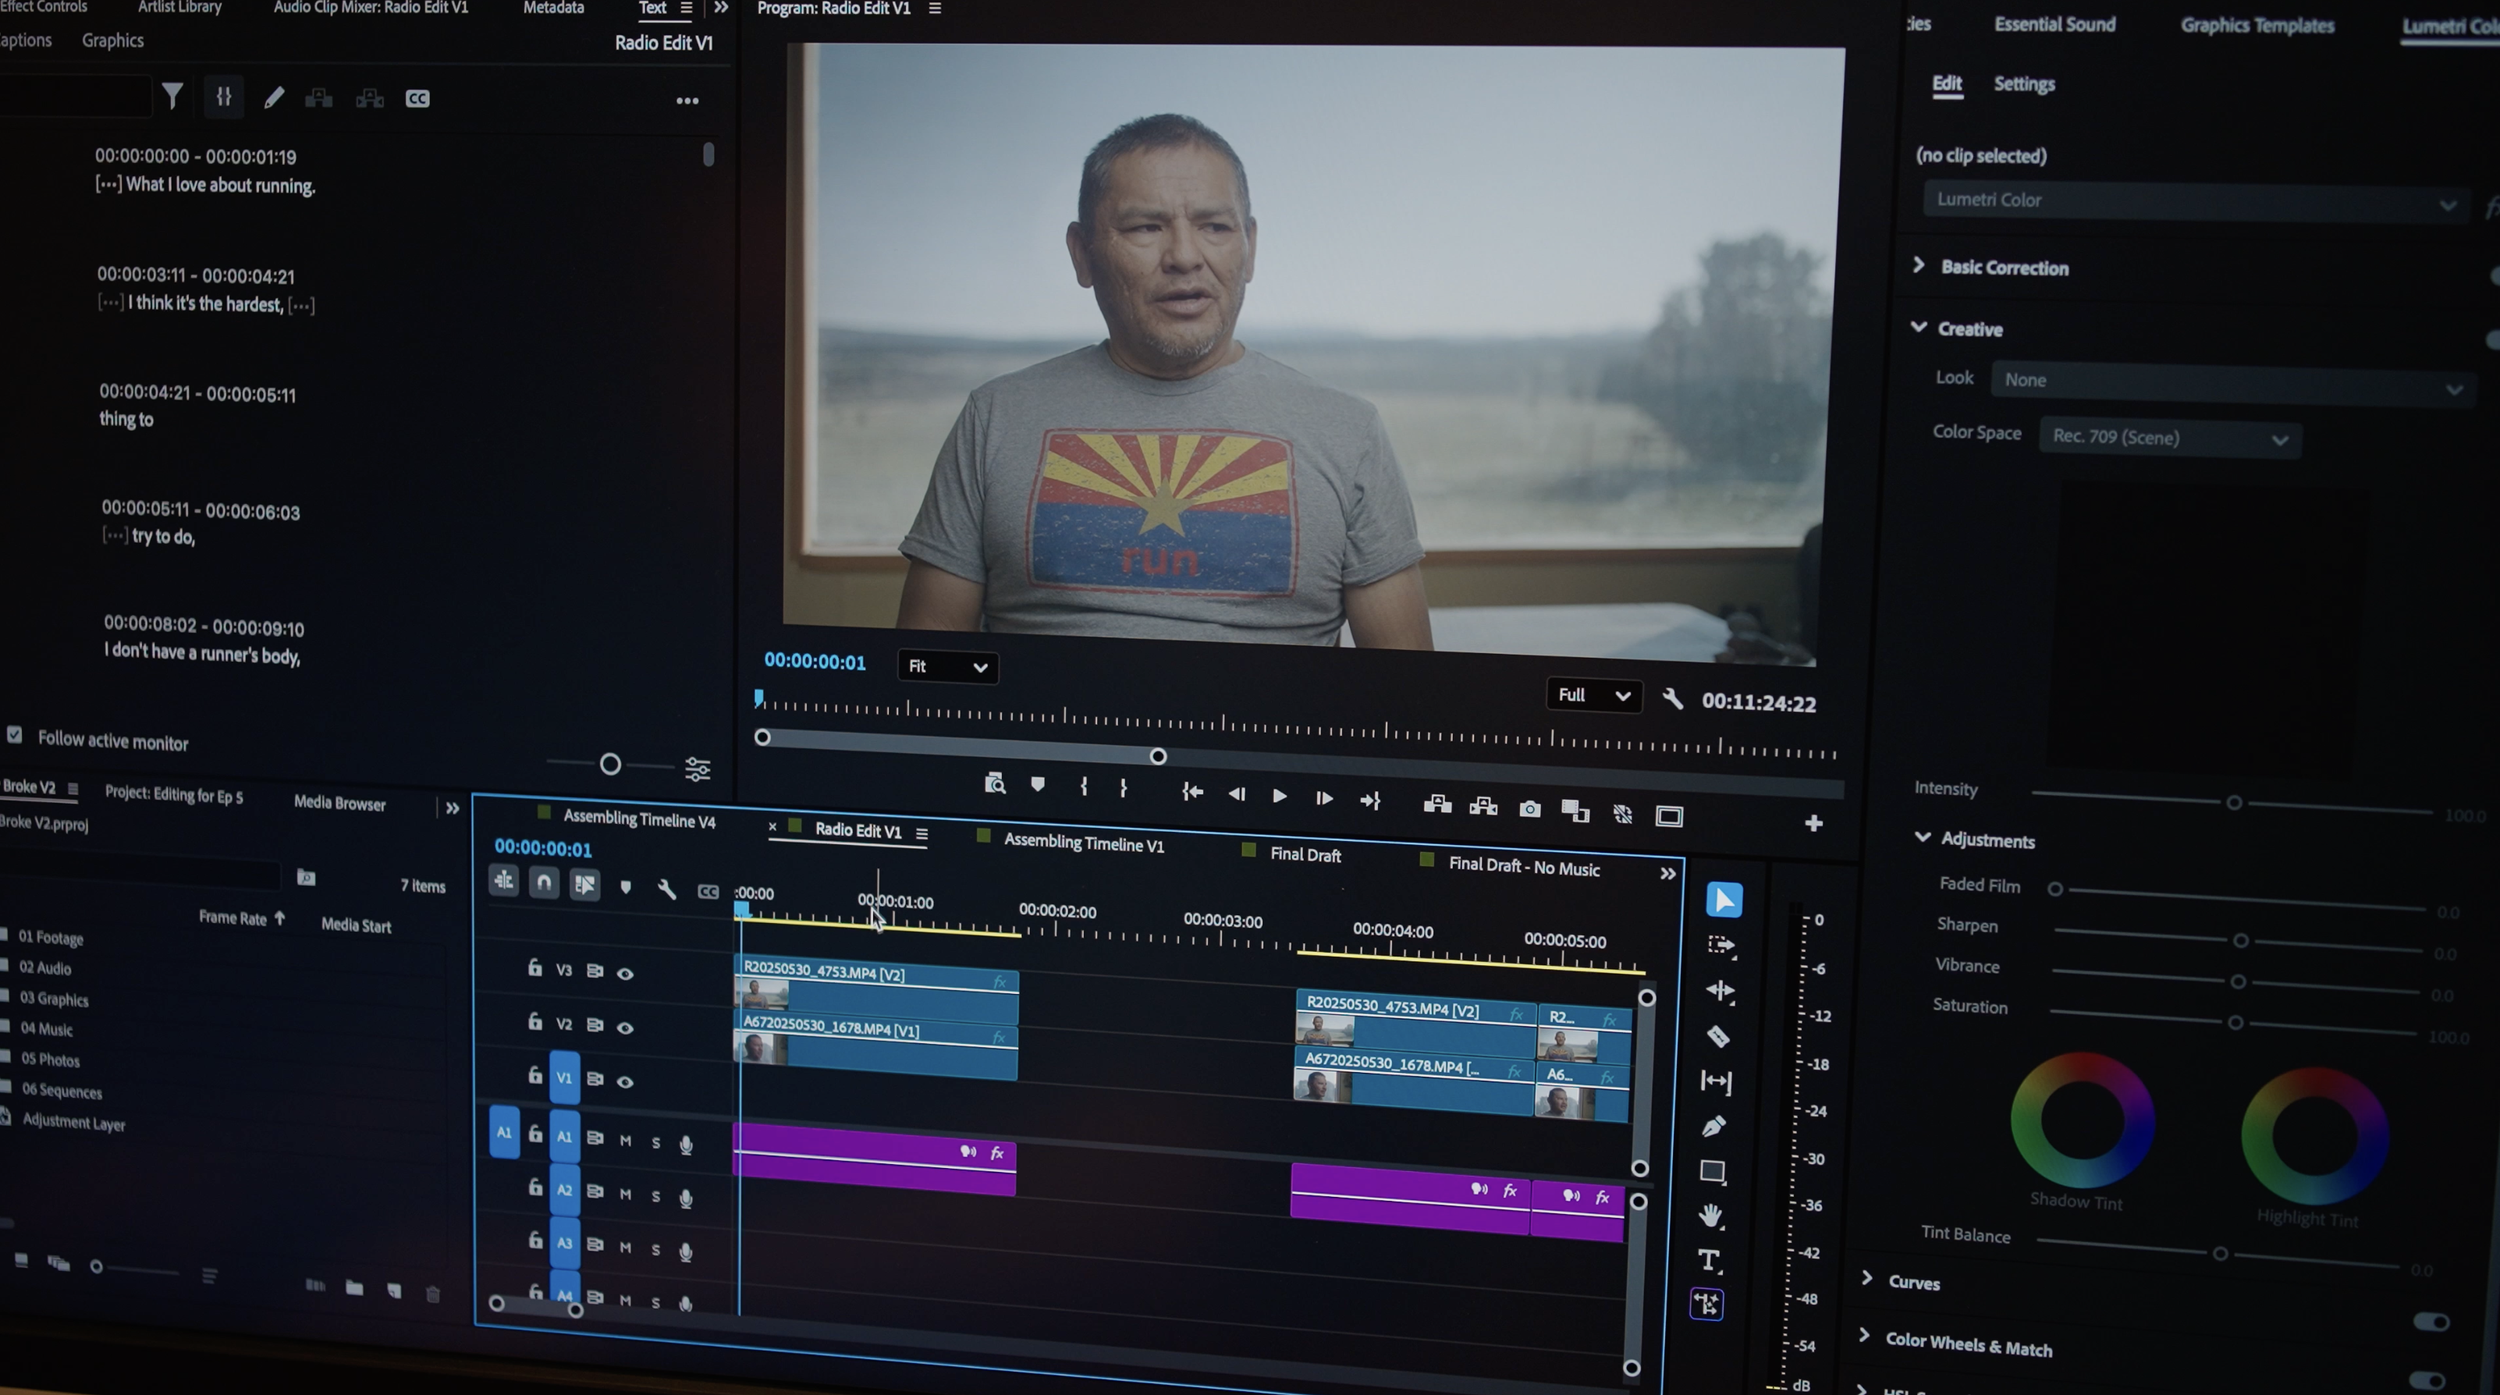
Step 3: The radio edit (audio story first)
Before you touch “cool visuals,” build a radio edit.
A radio edit means if you closed your eyes, the story still makes sense. This is the step most people skip, and it’s why their edits feel random even when the footage is beautiful.
How the radio edit works depends on your spine:
Radio edit for shorts
Get your line or VO in place first. That might be a single sentence, a text line you’ll put on screen, or a short spoken hook. Then choose a music bed that supports the tone. Your visuals will follow those beats.
Radio edit for commercials
Pick music early. Then build a rhythm map. Drop markers on key musical moments: downbeats, rises, chorus, breath points, and where you want the viewer to feel something shift. You’re creating a blueprint for pacing.
Radio edit for documentary / YouTube
Lay out interviews or narration first in a logical order. Build story logic: setup, tension, shift, payoff. Once the audio arc exists, the visuals become easier to place because you know what each moment needs to communicate.
This step is about earning direction. When the radio edit is strong, visuals stop feeling like “clips” and start feeling like scenes.
Step 4: Anchor beats (your structure map)
Once your radio edit exists, lock a simple structure using anchor beats. Anchor beats are the big story moments that make the viewer feel like the film is going somewhere.
A clean commercial-style structure you can apply to most running edits:
Arrive — shoes, door, watch, stepping into the world
Start — first movement, first breath
Struggle — hill, weather, legs, effort
Breakthrough — rhythm clicks, view opens, something shifts
Finish — exhale, stop, silence, return
You can use this structure even for a personal YouTube run. The difference is tone, not architecture.
Put markers on your timeline for these anchors. It gives you a map. If your edit feels flat, it’s usually because the anchors aren’t clear or the transitions between them don’t evolve.
Part 2 - Rhythm
Step 5: Cuts follow effort (the cadence rule)
Running has cadence. Your edit should too.
A common mistake is keeping the same pacing for the entire video. If the run gets harder but your edit stays flat, it feels boring. If the run is calm but your edit is frantic, it feels fake.
A simple pacing model:
Warmup = longer shots
Effort = quicker cuts
Breakthrough = slow down and let a moment land
Zoom out on your timeline occasionally. You should see density change. Calm sections should breathe. Effort sections should tighten. Breakthrough moments should create space.
Pacing is not about cutting fast. It’s about cutting accurately.
Step 6: The 3-cut formula (wide → medium → detail)
If you want an instant upgrade, use this.
For any key moment in your running sequence—turning a corner, cresting a hill, entering a new section—cut it in this order:
Wide — where are we
Medium — what’s happening
Detail — what does it feel like
Wide gives context. Medium gives movement. Detail gives emotion.
Detail options that work constantly in running films:
Foot strike
Breath
Hand on shorts
Watch beep
Zipper / jacket movement
Sweat
Gravel / dirt kick
Wind in trees
Fingers adjusting a strap
When you repeat this pattern, the audience relaxes because they understand your visual language. They don’t have to work to figure out what’s happening. They can feel it.
Step 7: J-cuts (audio leads picture)
A J-cut is when audio starts before the visual changes.
This is a small technique that makes your edit feel smooth and professional, especially in running footage where hard cuts can feel jarring.
Instead of cutting video and audio at the same frame, let breath or footsteps lead the next shot by a few frames. The viewer transitions through sound, not shock.
Use J-cuts when:
Switching angles during the same action
Moving between environments (forest to open ridge)
Shifting from calm to effort or effort to calm
You don’t need to overdo it. A few frames is enough.
Part 3 - Sound
Step 8: Build a real sound stack (not just music)
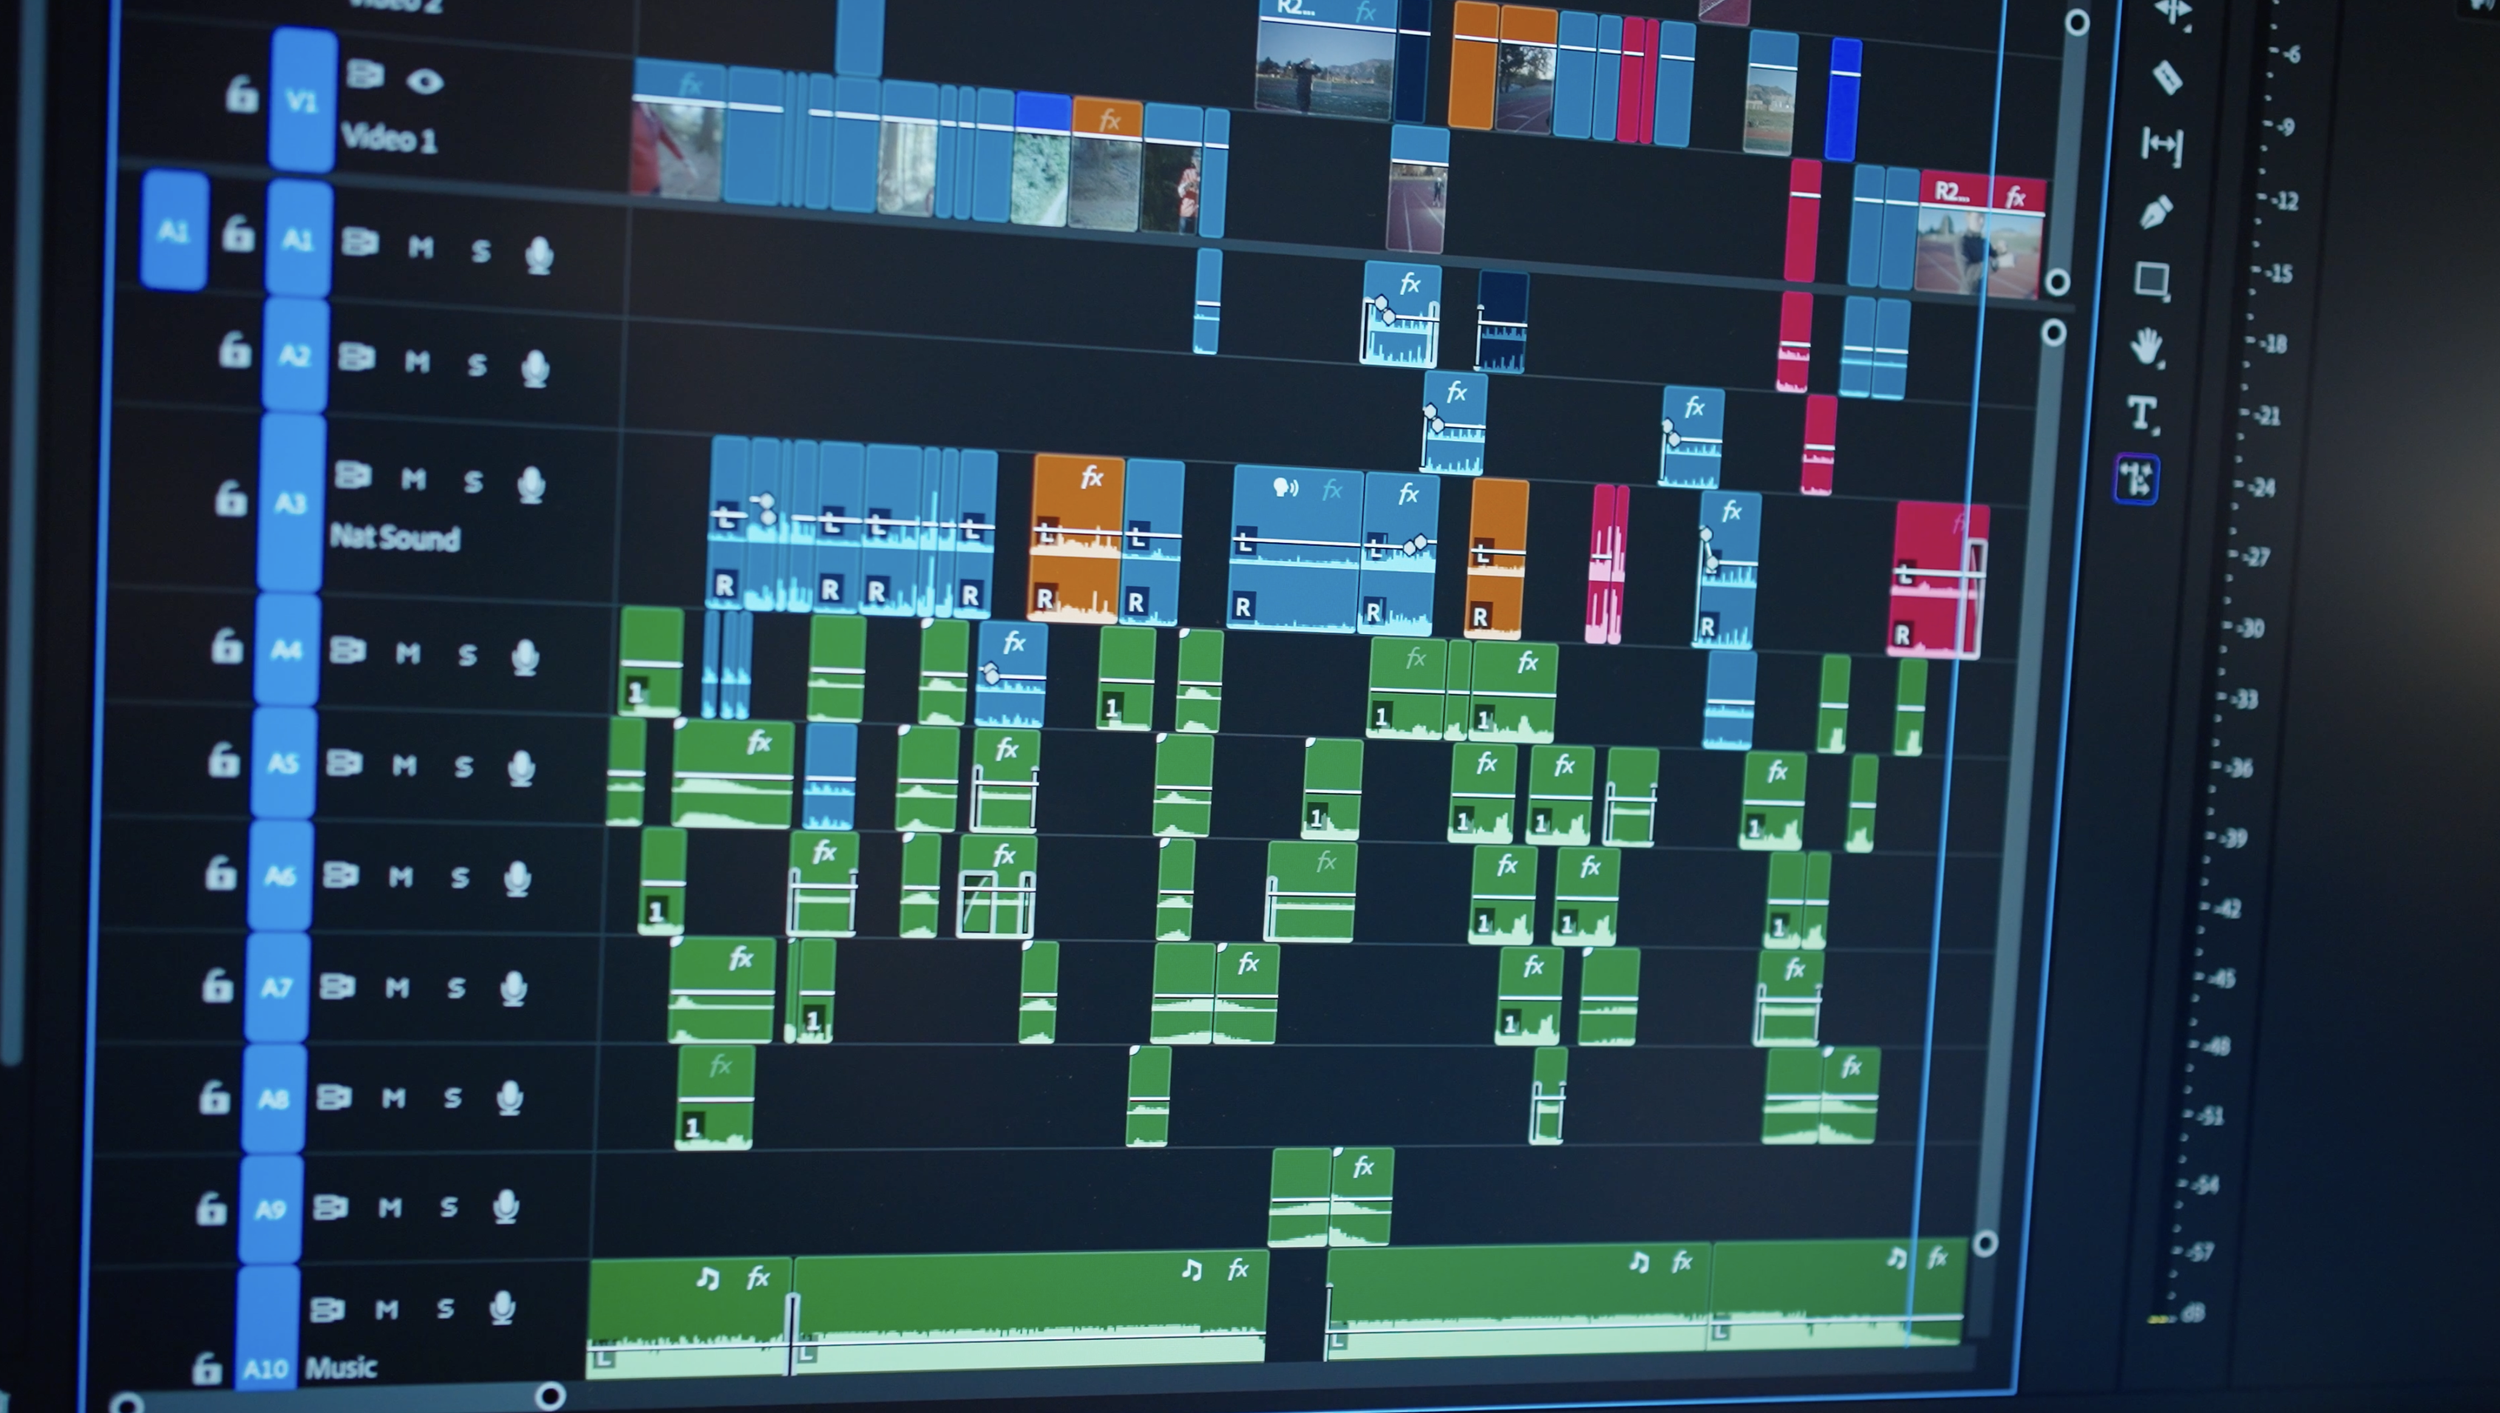
Most running videos rely on music to do all the emotional work. Sound design is what makes it feel physical, human, and real.
A practical track layout you can use in Premiere:
A1–A2: VO / dialogue (if any)
Split dialogue across two tracks for control. Keep it clean and consistent.A3: Natural sound
Footsteps, breath, wind, ambient tone. This is the bed of reality.A4–A9: SFX layers
Cloth movement, subtle whooshes, small impacts, texture. Think seasoning, not sauce. Organize it so you can mute groups and adjust quickly.A10–A11: Music layers
Two tracks gives you flexibility for control, duplicates, or impact layers.
Two important principles:
The goal isn’t loud. The goal is felt.
Let the run breathe.
If music is doing everything, it stops feeling human. If SFX are everywhere, it feels fake.
Natural sound is your secret weapon. Breath and footfalls make the viewer feel like they’re inside the runner’s body. That’s what separates montage from film.

Why We Should Work Together…
When I’m not on this website rambling on about filmmaking, I’m actually out there making films. From crafting memorable branded documentaries to capturing stories and products that move people, I’ve got you covered. Need a filmmaker who can scale mountains, brave the surf, or just tell a dang good story? Let’s chat!
In case I haven’t convinced you, here are three reasons why it might be fun to work together…
I believe in stories that stick with you - like campfire smoke on your clothes. The kind that makes you laugh, cry, or immediately want to call your mom.
I’m just as comfortable at 14,000ft as I am in front of a timeline. You get me in the mountains, in the ocean and in the editing room, making sure the magic out there really shines in the final cut.
I’ve filmed in some pretty wild places, but the best stories are the ones that bring people together. It’s those shared moments -big or small - that remind me why I love what I do.

Let’s Connect
Roo is an Emmy nominated commercial/documentary filmmaker and photographer based in Boulder, Colorado but travels all around the world for his filmmaking career. He has directed documentaries for Patagonia in California, produced films for Outside Magazine throughout Europe and Africa, camera operated for Netflix in the Rocky Mountain West, photographed among indigenous communities in South America, and has received notable recognition and awards in the outdoor industry for his work telling uplifting stories in the outdoor space.